WordPress Plugin to feed CodeProject Technical Blogs
CodeProjectFeeder
Update 3. sept. 2011:
Fixed a bug according to WeBiscuit’s post at the CodeProject Technical Blog Article. See download of version 1.11.
In the beginning, everything was done manually.
After the third time I had to edit feed-rss2.php of wordpress to fulfill CodeProjects Technical Blogs requirements I now wrote my first (and last?) wordpress plugin.
As you may know, CodeProject allows you to publish articles through your current blog. See here for the FAQ.
As I am using wordpress, I started some time ago to submit blog entries into CodeProject. I had to find out myself, where to change which file.
Limit published articles
To limit the range of blog entries that are published at CodeProject Technical Blogs I use a ‘hidden’ feature and created a category named ‘CodeProject’ in my WordPress blog. On my Technical Blogs site in CodeProject I then used http://www.hjgode.de/wp/category/codeproject/feed/ for the feed input. Now only the articles marked with WordPress category ‘codepoject’ are feed to CodeProject.
Manually changes required in WordPress for CodeProject Technical Blogs
In feed-rss2.php I always had to add a <category>CodeProject</category> line below <channel>. Further I had to change the footer.php of the wordpress theme Win7blog that I use. There I added a rel=”tag” line as recommended by CodeProject.
The pain of doing it again and again
Now, the first manual change has to be done everytime you update your wordpress release. I had to to this at least three times before I start now with a plugin to I avoid changing the file again manually.
The idea of a WordPress plugin
I never wrote a WordPress plugin before, but I did some html, php and mysql coding before (ie the calendar on www.fewo-britta.de or the static pages at www.derbiedermann.de, which are generated from a db). But the learning curve was hard and it took me several hours to get the plugin working. I started with the plugin described at DevLounge in there “How to write a WordPress plugin” series. The article was the only one I could find that describes wordpress plugin development from scratch with a working example.
As I had problems adopting the code to my needs, especially the AdminPage, I had to rewrite the code a little bit.
My first WordPress plugin
OK, what does the plugin do?
The plugin inserts a rel=”tag” in your blogs page footer. This may look more or less good, depending on the theme you use. The footer always appears outside the themes footer. I could not find a way to let it appear inside the themes footer, if the theme uses the action hook wp_footer() ouside there footer block (here after the </div>:
<div id="footer">
 <p><?php bloginfo('name'); ?>@<?php echo date('Y'); ?>
 <br>
 <a href="<?php bloginfo('home') ?>/"><?php bloginfo('home'); ?></a>
 <br>
 Designed by <a href="http://www.kamiyeye.com/">kamiyeye</a>
 <br>
 <?php StatPress_Print("%totalvisits% Hits."); ?>
 </p>
</div>

</div><!-- #wrapper .hfeed -->

<?php wp_footer(); ?>

</body>
</html>
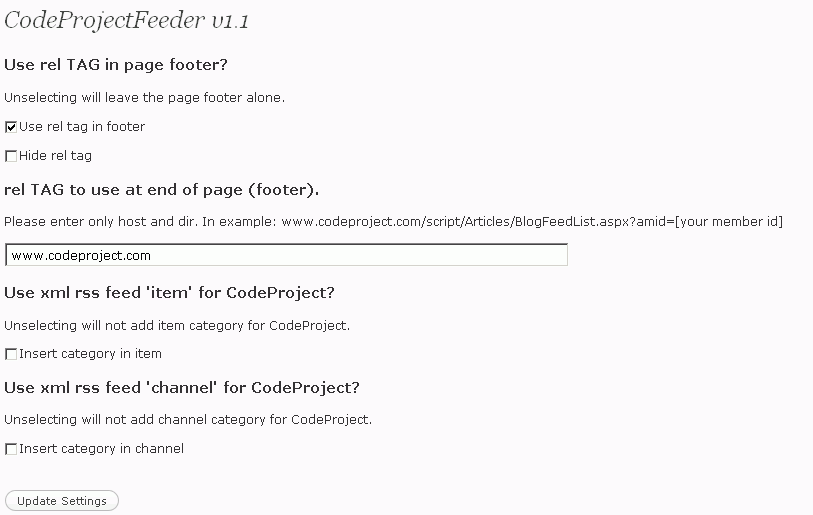
The plugin provides some checkbox options, so you can a) hide the rel=”tag” or b) dont use it at all.
To feed your publications to CodeProject technical blogs, you are recommended to add a category tag with the contents CodeProject in your RSS2 feed. To get this done by the plugin it installs two action hooks: the channel one: rss2_head and the ‘item’ one called rss2_item.
Here are the hooks I use in the plugin:
//Actions and Filters
if (isset($hgo_codeprojectfeeder)) {
 //Actions
 add_action('admin_menu', 'CodeProjectFeeder_ap');
 add_action('wp_footer', array(&$hgo_codeprojectfeeder, 'addFooterCode'), 1);
 add_action('activate_codeprojectfeeder/codeprojectfeeder.php', array(&$hgo_codeprojectfeeder, 'init'));
 add_action('rss2_head', array(&$hgo_codeprojectfeeder, 'addChannelCode'), 1);
 add_action('rss2_item', array(&$hgo_codeprojectfeeder, 'addItemCode'), 1);
 //Filters
}
The first hook is for the ‘Admin’ settings page.
The second one for the blog footer page.
The ‘activate_…’ hook is for initializing the plugin.
The rss2_head and rss2_item hooks are used to insert <category>codeproject</category> into the RSS2 header (<channel>) or <item> code.
Formatting of the rel=”tag” link
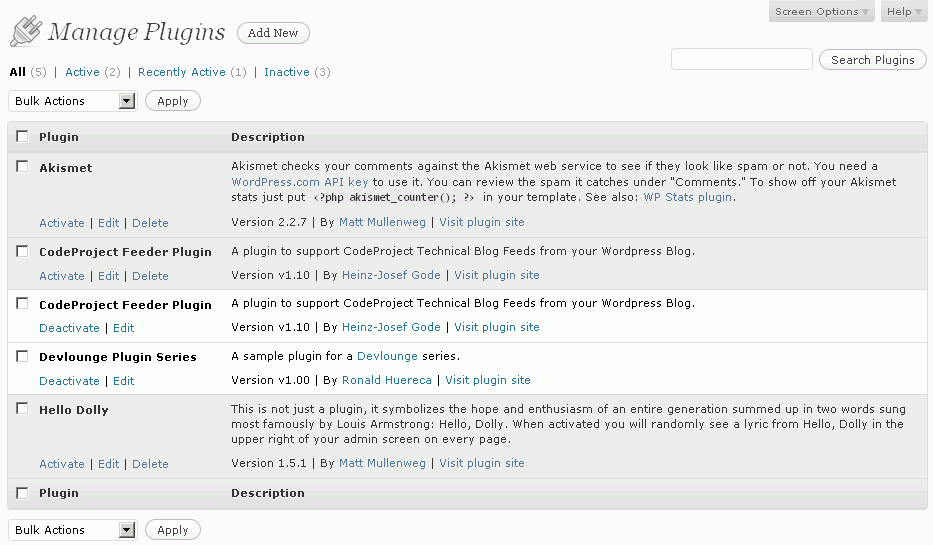
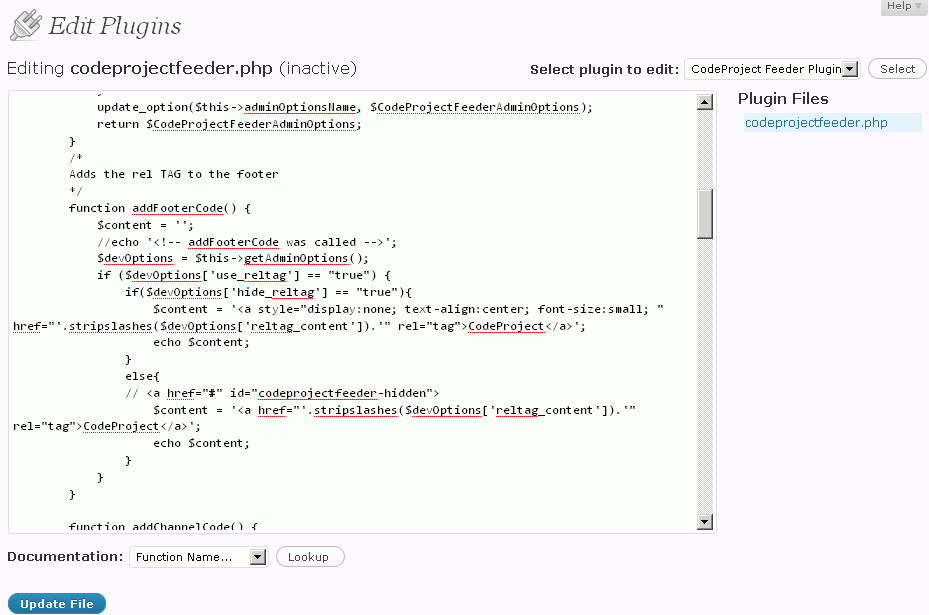
If you dont like the formatting of the rel=”tag” link, you can edit the plugin file codeprojectfeeder.php from inside WordPress, just click “Edit” below the “CodeProject Feeder Plugin” on the Manage Plugins page in your WordPress installation:
/*
 Adds the rel TAG to the footer
 */
 function addFooterCode() {
   $content = '';
   //debug
   //echo '<!-- addFooterCode was called -->';
   $devOptions = $this->getAdminOptions();
   if ($devOptions['use_reltag'] == "true") {
     if($devOptions['hide_reltag'] == "true"){
       //using the style option you can adjust the link appearance
       $content = '<a style="display:none; text-align:center; font-size:x-small; " href="'.stripslashes($devOptions['reltag_content']).'" rel="tag">CodeProject</a>';
       echo $content;
     }
     else{
       $content = '<a style=" text-align:center; font-size:x-small; " href="'.stripslashes($devOptions['reltag_content']).'" rel="tag">CodeProject</a>';
       echo $content;
     }
   }
 }
You can change the appearance of the footer text with the css inline style statements, as there are already “text-align:center; font-size:x-small;”
With the other options of the plugins admin settings page you specify, if you like to have the category tag within channel for all pubilcations or inside every item. You should not use both, it does not make sense.
Plugin uses checkboxes instead of options
As you can see from the codeprojectfeeder.php code, I have changed the way yes/no options are used in the settings admin form. Instead of the very long, hard to manage lines, I use the shorter form and checkboxes:
<p><INPUT TYPE="CHECKBOX" id="codeprojectfeederUseRelTag" name="codeprojectfeederUseRelTag" value="true" <?php if ($devOptions['use_reltag'] == "true") { echo 'CHECKED'; }?>>Use rel tag in footer</p>
instead of
<p><label for="devloungeHeader_yes"><input type="radio" id="devloungeHeader_yes" name="devloungeHeader" value="true" <?php if ($devOptions['show_header'] == "true") { _e('checked="checked"', "DevloungePluginSeries"); }?> /> Yes</label> <label for="devloungeHeader_no"><input type="radio" id="devloungeHeader_no" name="devloungeHeader" value="false" <?php if ($devOptions['show_header'] == "false") { _e('checked="checked"', "DevloungePluginSeries"); }?>/> No</label></p>
You can download the codeprojectfeeder plugin as zip: [Download not found]
Version 1.11: [Download not found]
Development and debugging
As you can see in codeprojectfeeder.php, there are some comment lines with a //debug line before. I used these during development to find my typos and bugs.
The plugin was tested on a lampp system (an Acer Aspire One A150 netbook), a windows xampp system and finally in my blog. Just be warned that due to caches or whatever of the testing lampp/xampp systems, sometimes the output was not altered and nothing changed, although source code was changed. I had to restart apache/mysql to get correct results. The RSS2 feed was sometimes cached by firefox/ie and was hard to debug, as the contents did not change although the source code was changed.
Installation
Just unzip the files into a dir called codeprojectfeeder below your wordpress wp-content/plugins dir or unzip the directory codeprojectfeeder into your wordpress plugins dir. Then Activate the plugin and select the CodeProjectFeeder settings you like.
Finally
Now, you and me dont need to change the feed-rss2.php file manually any more for CodeProject Technical Blogs.



 http://www.led-mg.de