March 10, 2018, 09:45
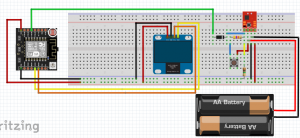
This is the successor of my MQTT remote display. It is battery driven and can so be placed where you want.
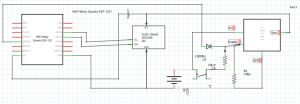
The main component is a Pololu U1V11F3, a step up/down converter with 3V3 output and an Enable input pin. Unfortunately the Enable pin is already clamped to Vin via a 100K resistor. For me I had to remove the small SMD resistor to have the circuit powered off normally. The R6/100K is located directly to the Enable in Input connectors of the Pololu board.
The Enable pin is then connected to GND via an 1M resistor to ground. Do not leave the Enable pin floating, it will sense a finger tip already and switch to on/off by accident.
Then I added a momentary switch and a 47K resistor between Vin (the battery Plus) and the Enable pin. If the switch is pressed, the converter starts and gives 3V3 on it’s Output pin. This powers the ESP12 and the OLED display. But only as long as you press the switch. So I added a Diode from GPIO14 of the ESP-12 to the Enable pin.


In the code, GPIO14 is set as output and immediately set to high. This will enable the converter even when the switch is released.
After some code cycles, the GPIO14 output is set to low and the power of the converter is shut down.
The converter will not drain the battery in shutdown mode. But you need to press and hold the switch 2 or 3 seconds until the code powers the Enable pin.
February 26, 2018, 19:00
I wanted to have a small display with some essential Home Automation data. So I buy an 1.3″ OLED display with I2C interface and started to look for some existing code for an ESP8266. The display should be feed using WiFi and be portable, so I can place it where needed.
I started with ESPeasy, as there is already support for multiple pages with text lines. Unfortunately the code is written to show sensor data of directly connected sensor only. No option to publish free text or data from a Home Automation system. The ESPeasy code will save the text to flash memory on every change when using the Web GUI. The flash memory would wear out after some month with my use case.
Finally I decided to start my own code. First I had to find out that the OLED display is not an SD1306 but a SH1106 one. Although some people state that these are more or less the same, the SD1306 libraries did not work for me. Then I found https://github.com/ThingPulse/esp8266-oled-ssd1306 which works well for me.
Starting with SSD1306UiDemo.ino I added WiFi and MQTT libaries and code.
My code will show 6 lines of text on two frames (3 lines each). The frames will change every 5 seconds. The content of the text lines is published by a FHEM server. As there was no easy way to integrate the display using a MQTT_DEVICE definition in FHEM, I wrote my own perl mqttmsg sub function and used the FHEM notify definition to publish changes to the display.

a small video
Continue reading ‘FHEM: Home Automation remote display using small OLED and MQTT’ »
February 29, 2016, 20:06
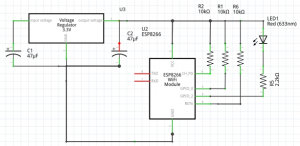
Ich brauche eine einfache WLAN Steckdose und möchte nicht 30 und mehr Euro dafür ausgeben. Ausserdem soll nur eine minimale Anzahl an Bauteilen verwwendet werden. Da ich noch einen ESP-01 hier habe, wollte ich diesen als WLAN Schalter verwenden. Dazu braucht es nur noch einen Transistor, ein Relais (5V, 220V/10A), ein paar Widerstände und Kondensatoren, einen 3.3V Spannungsregler und ein 5V Netzteil (habe hier noch eins rumliegen).
Als Software habe ich ESPeasy gewählt (siehe auch FHEM Forum). ESPeasy ein MQTT Publisher und kann über einfache http Posts auch GPIO schalten. Das Web-Interface und die HTTP Schnittstelle sind einfach zu bedienen und das Web GUI wird später gar nicht gebraucht.

Continue reading ‘fhem: Lampe und Temperatur mit ESPeasy’ »
November 5, 2015, 21:07
Manchmal möchte man vielleicht ein serielles Gerät (device) statt über USB oder RS232 entfernt vom FHEM Server betreiben. Zum Beispiel einen FhemDuino oder SignalDuino oder RFXCOM. Dies ist nun mit einem ESP-01 oder einem anderen ESP Modul basierend auf dem ESP-8266 einfach möglich.
Der ESP-8266 bietet WLAN Anbindung, zwei oder mehr GPIO Ein- und Ausgänge und eine serielle Schnittstelle. Mit Hilfe geeigneter Software kann man einen ESP-8266 als WiFi-Serial Bridge einsetzen. Das heisst, alles was seriell rein oder raus geht wird über WiFi und ein geeignetes Protokol zum oder vom FHEM Server übertragen.
In meinem Beispiel betreibe ich einen Arduino Nano mit der SignalDuino Software und einem ESP-01 mit der JeeLink Software esp-link an meinem FHEM Server.
Continue reading ‘FHEM – serielle Geräte über WiFi anbinden’ »


 http://www.led-mg.de